
How to Create a Wedding RSVP Google Form
A short RSVP form keeps names, attendance and guest counts in one place. Build it in two sections so guests who decline can finish without answering meal or headcount questions.
This guide covers creating the form. Once it works, use our Google Maps and RSVP PDF guide to add its link to your invitation.
Contents
1 Start | 2 Questions | 3 Branching | 4 Settings | 5 Publish and test | 6 Count replies
1 Start a blank form
Open Google Forms, sign in and choose Blank form. Add the couple’s names, wedding date, RSVP deadline and a host contact for changes.
Example title: Aarav and Meera Wedding RSVP. Description: Please reply by [date]. Submit one response per invitation and include only the guests named on it. For changes, contact [host contact].
Google help on creating a form
2 Add only useful guest questions
Use Add question for each field and turn on Required only where needed. Put the attendance question last in the first section.
| Question | Question type | Placement |
|---|---|---|
| Name of the person replying | Short answer | Section 1 · Required |
| Email or mobile for RSVP changes | Short answer | Section 1 · Optional |
| Will anyone on this invitation attend? | Multiple choice | Section 1 · Required |
| Full names of the invited guests attending | Paragraph | Section 2 · Required |
| Number of invited guests attending | Dropdown | Section 2 · Required |
| Meal choice for each attending guest | Paragraph | Section 2 · Optional |
For several functions, collect attending names for each event the household was invited to. A single shared headcount can hide different wedding and reception totals. Ask about meals only if choices are offered. Let guests discuss allergies or access needs privately with the host.
3 Send each answer to the right section
Keep names and attendance in Section 1. Click Add section in the right toolbar, name Section 2 Attending details, and place the guest names, count and meal questions there.
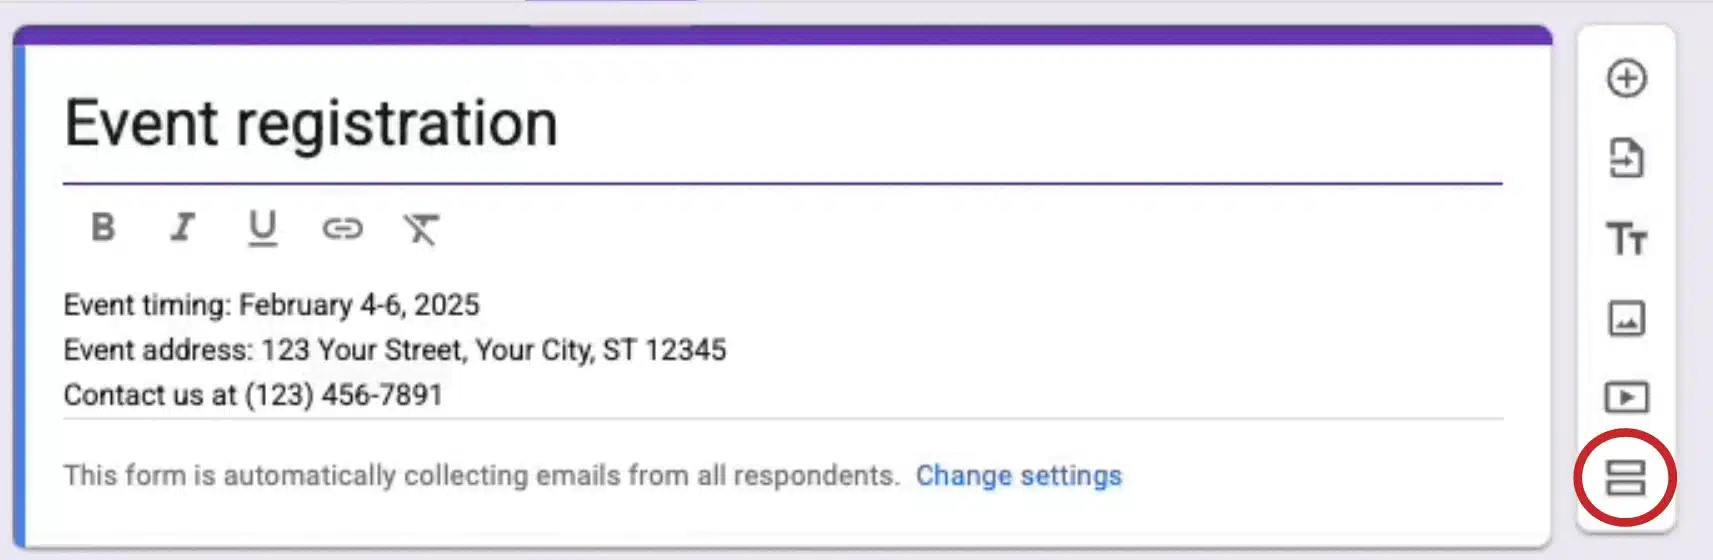
Google’s event registration demo with Add section circled. Use your wedding wording instead of the example content.
Return to the attendance question in Section 1. Use Multiple choice, with two answers: Yes, one or more of us will attend and No, we are unable to attend. Open the question’s three-dot menu and select Go to section based on answer.
- Yes → Section 2, Attending details.
- No → Submit form. Do not require a reason for declining.
- Section 2 → Submit form. It is the final section in this two-section setup.
Branching works with Multiple choice or Dropdown questions. It moves guests between sections, so keep the attendance question at the end of Section 1.
Google help on answer-based sections
4 Check access and privacy settings
- For a form guests can use without a Google account, keep Limit to 1 response off. That option requires sign-in.
- Leave automatic email collection off if you use the optional contact question above. Verified email collection involves a Google Account.
- In Settings → Presentation, keep View results summary off so guests do not see other people’s answers.
- Set a confirmation message that suits both answers: Thank you. Your RSVP has been recorded. For changes, contact [host contact].
Use only the headcount choices you need. A general form does not enforce a different guest allowance for every household, so reconcile names and counts with the invitation list.
Google help on settings and responder access
5 Publish and test the guest link
When the questions are ready, select Publish, then Manage to check responder access. For guests without Google accounts, choose Anyone with the link under General access if available. Anyone receiving a forwarded link can then open it. Use restricted access instead when that matters more, and check that your guests can sign in.
Finish publishing. Then select Published → Copy responder link. Copy the guest link, not the address of your editing page. A work or school account may have additional sharing restrictions.
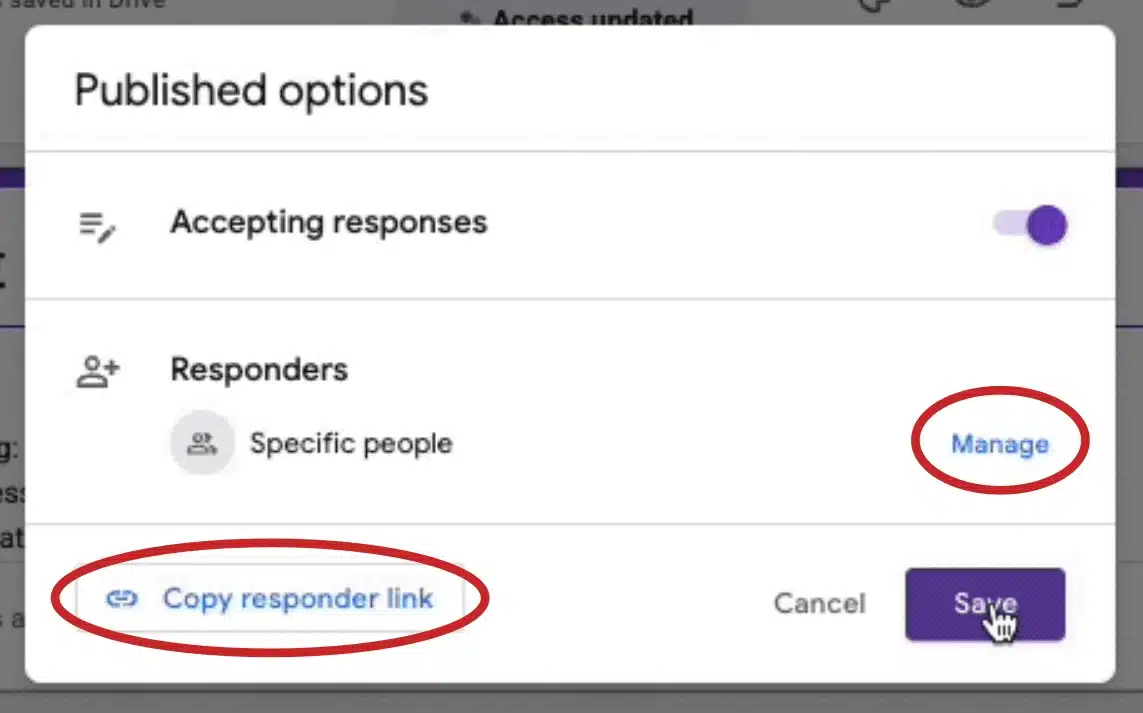
Google’s demo shows Specific people. Use Manage to choose the access you intend; Copy responder link supplies the guest URL.
Before sending invitations, open the responder link on a phone and in a private browser window where you are signed out. Check all four points:
- The form opens without an unexpected permission or sign-in request.
- A Yes reply reaches Attending details; a No reply skips them.
- Submit one clearly labelled TEST response for each route in your own form. Confirm both arrive under Responses.
- The confirmation message and host contact are correct. Exclude test submissions from your final count.
6 Read responses and count guests
Open Responses for the summary, then Individual to check each submission. Use Link to Sheets for a spreadsheet, or the response menu to choose a destination. Keep the form’s editor access and the linked sheet limited to the hosts who need them.
The number of responses is not your guest count. Total the attending guests, check duplicate households and record separate counts for each function. Opening the RSVP link alone does not record attendance.
At the deadline, stop collection through Published → Accepting responses. You can also set a closing date and time. For missing replies, use our polite RSVP reminder messages.
Google help on viewing and managing responses
Ready to add the working link? Follow the PDF invitation links guide or browse 3VIDEO PDF invitation designs.